Time to read:
In this post we are going to cover how you can enable RDP (Remote Desktop Protocol)1 properly using group policy. In my example I am going to be using a Windows Server 2022 (Datacenter Edition) as the base for my DC (Domain Controller).
NOTE: to be able to carry out this process you will need to make sure you have the correct permissions to be able to create and modify GPOs (Group Policy Objects) that are located on your DC.
- SECTION I – Create Group Policy Object
- SECTION II – Configure Firewall Entry
- SECTION III – Configure Host RDP Policies
- SECTION IV – Apply GPO
- SECTION V – Verification
- SECTION VI – Footnotes
SECTION I – Create Group Policy Object
The first thing we need to do is to create a new GPO that we can then configure.
- Remote onto your DC.
- Open up the Group Policy Management application.
- Expand the Group Policy Objects Folder.
- Right click and select New.
- Give the new GPO an appropriate name – in my example I am going to use ‘COMPUTER:Enable Remote Desktop’.
- Right click on your newly created GPO and select Edit.

FIGURE 1 – Locate Group Policy Management
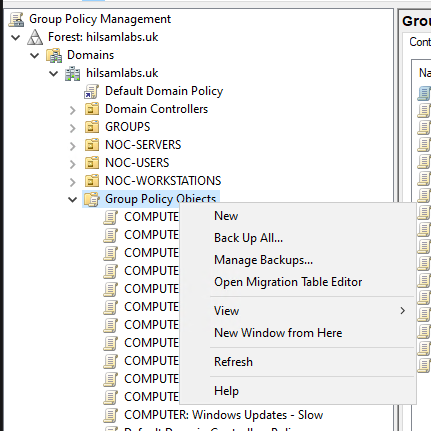
FIGURE 2 – New GPO
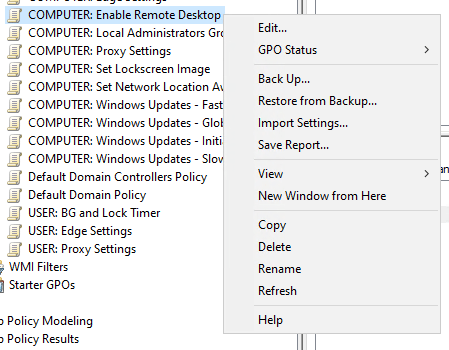
FIGURE 3 – Edit New GPO
Now that your GPO is created and you are in the correct place to edit it you can carry out Section II and Section III in either order.
SECTION II – Configure Firewall Entry
We need to allow the host based firewall on each device that we want to enable RDP on to be able to receive the RDP traffic. By default RDP is set to use TCP port 3389 so that is the port we will be opening within the firewall settings.
NOTE: in my example I am going to be setting up the firewall rule so that port 3389 is open only from a specific IP (Internet Protocol) address which will be the IP of my RDS (Remote Desktop Services) server.
- Navigate to the following policy location:
- Right click anywhere in the main right hand pane of the windows and select New Rule.
- Select the Custom Rule radio button and then click Next.
- Select the All Programs radio button and then click Next.
- On the Protocols and Ports page set the following then click Next:
- Protocol Type: TCP
- Local Port: Specific Ports from the drop down and then enter 3389 in the box underneath
- Remote Port: All Ports
- On the Scope page set the following and then click the Next button:
- Local IP addresses: select the These IP Addresses radio button then click the Add button and then add the source IP address that you would expect RDP traffic from
- Remote IP addresses: select the Any IP Address radio button
- Select the Allow the connection radio button then click the next button.
- Tick only the Domain profile and then click the next button
- Give your firewall rule an appropriate name – in my example I am going to use ‘RDP’.
Computer Configuration\Policies\Windows Settings\Security Settings\Windows Defender Firewall with Advanced Security\Windows Defender Firewall with Advanced Security\Inbound Rules
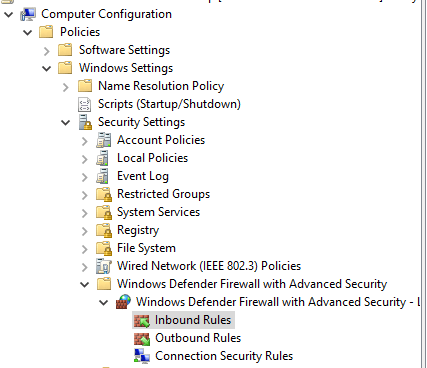
FIGURE 4 – Inbound Rules
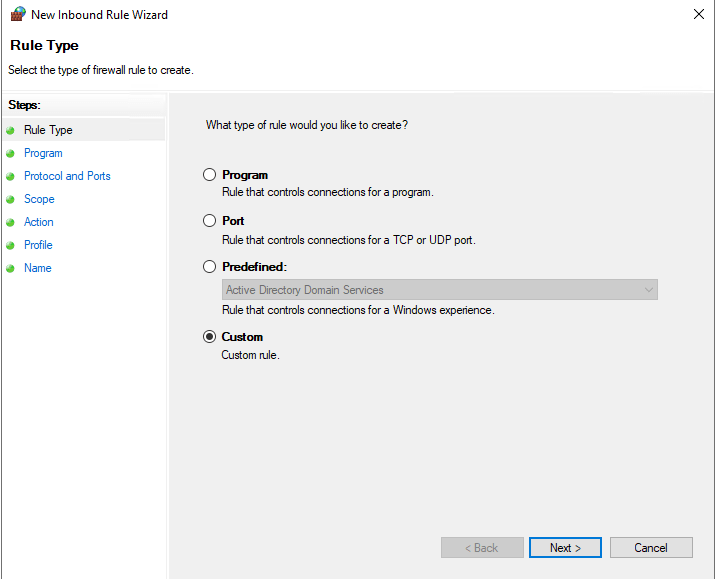
FIGURE 5 – Rule Type
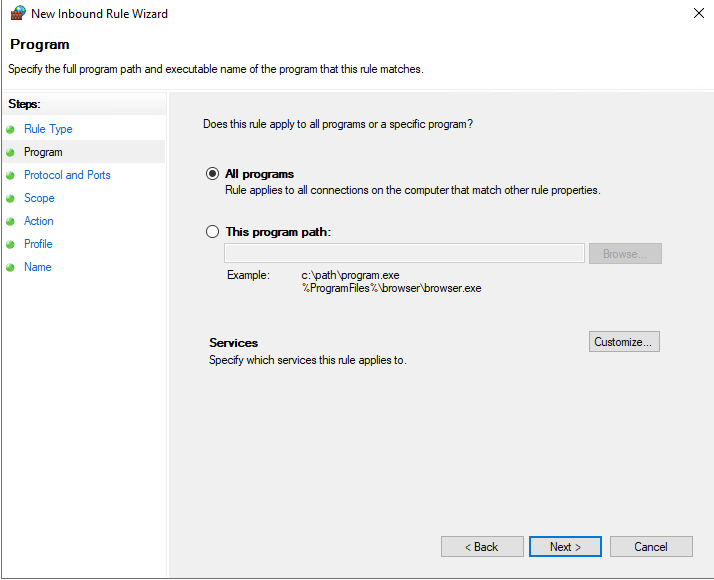
FIGURE 6 – Program
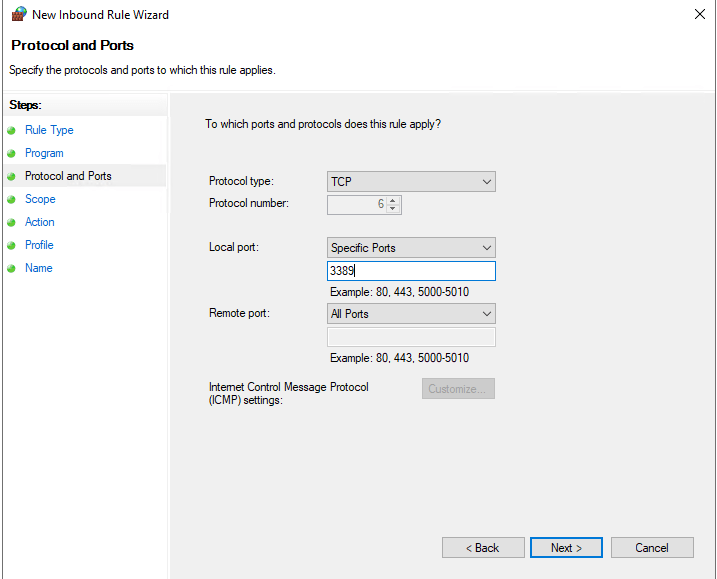
FIGURE 7 – Protocol and Ports

FIGURE 8 – Scope
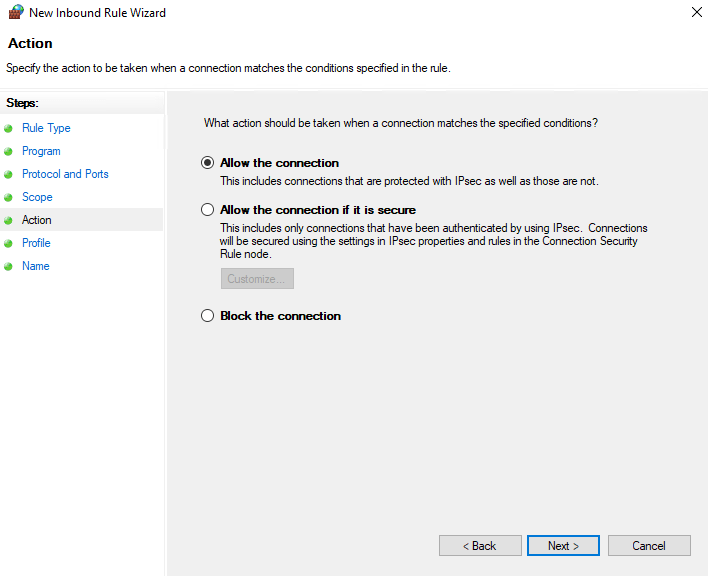
FIGURE 9 – Action
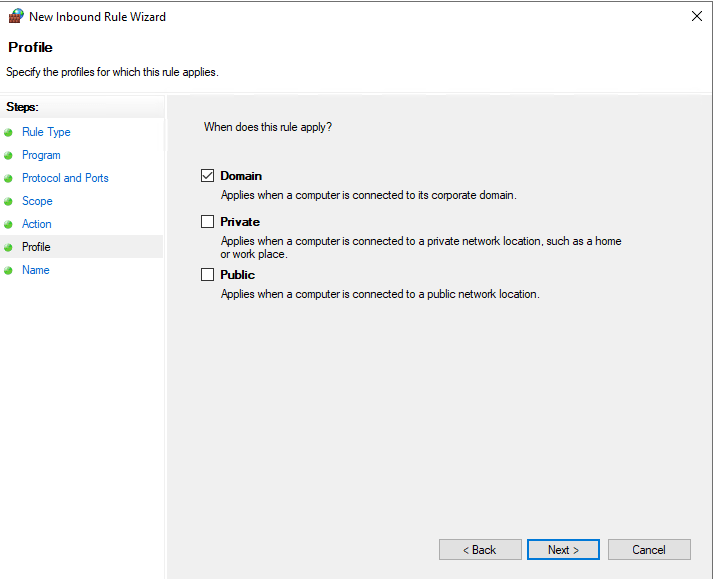
FIGURE 10 – Profile
SECTION III – Configure Host RDP Policies
We need to configure the remote desktop policy on the host to allow it to receive an RDP connection.
- Navigate to the following policy location:
- Locate the Allow users to connect remotely by using Remote Desktop Services policy, double click, select the Enabled radio button and then click the Ok button.
Computer Configuration\Policies\Administrative Templates\Windows Components\Remote Desktop Services\Remote Desktop Session Host\Connections
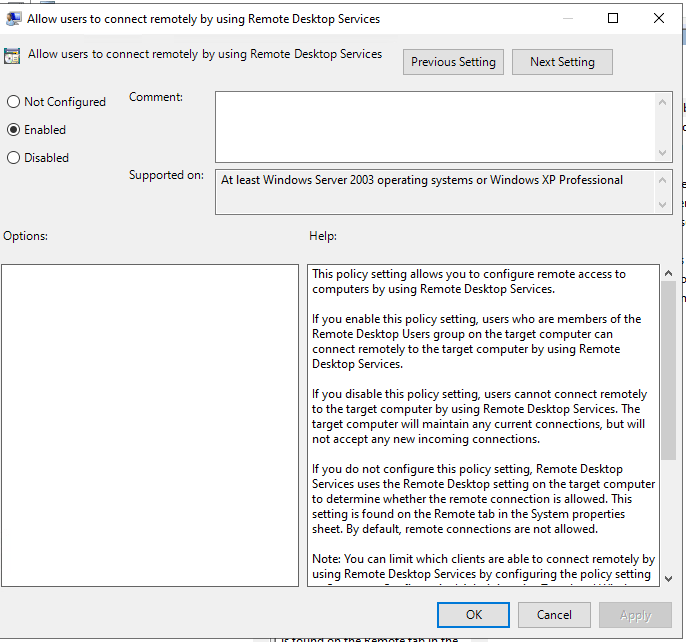
FIGURE 11 – Allow RDP Connection
We need to configure the remote desktop policy on the host configure a security policy for the authentication that we do not want to be used.
- Navigate to the following policy location:
- Locate the Require user authentication for remote connections by using Network Level Authentication policy, double click, select the Disabled radio button and then click the Ok button.
Computer Configuration\Policies\Administrative Templates\Windows Components\Remote Desktop Services\Remote Desktop Session Host\Security
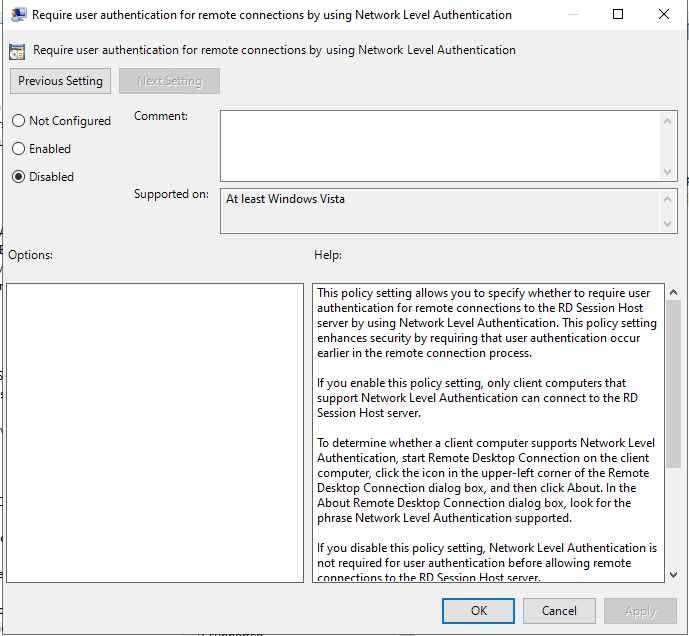
FIGURE 12 – Require Network Level Authentication
SECTION IV – Apply GPO
Now that our GPO has been configured with all the policies we need to allow RDP we now need to apply that GPO to applicable Windows components.
- Within the Group Policy Management application locate any OUs (Organisational Units) that you would like to apply your enable RDP GPO to. NOTE: In my example I am going to use the OU NOC-SERVERS
- Right click on the OU and select the Link an Existing GPO option.
- Find and Select the GPO you have created and then click the Ok button.

FIGURE 13 – Link an Existing GPO

FIGURE 14 – Select GPO
SECTION V – Verification
SECTION V – A – Pull Group Policy
- Establish a connection to a computer that should have been affected by the new GPO – in my example I am going to log onto the ‘NOC01CA01’ server because it is in my ‘NOC_SERVERS’ OU that I have applied this group policy to.
- Click the Windows button and enter the following gpupdate /force and then press enter. This will open a command prompt window and run the command which will pull the latest group policy from the DC.
- Once the group policy is updated you will see the message Computer Policy update has completed successfully, then the command prompt window will close.
- Restart the computer you are on, to make sure that all changes are applied.
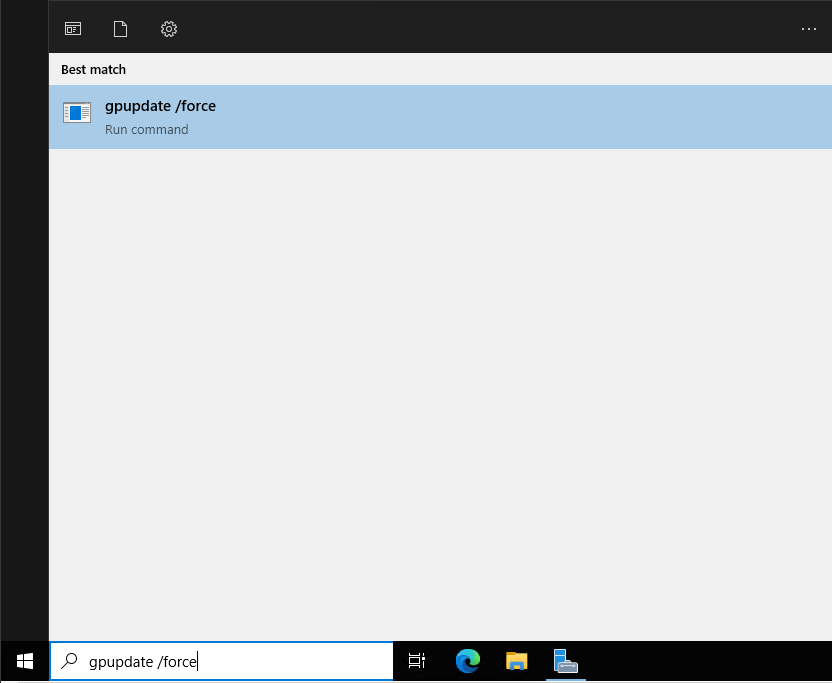
FIGURE 15 – Group Policy Update

FIGURE 16 – Policy Update Command Prompt
SECTION V – B – Check GPO Has Been Applied
Confirm remote desktop is enabled:
- Navigate to Server Manager.
- Navigate to Local Server.
- Next to Remote Desktop it should say Enabled.
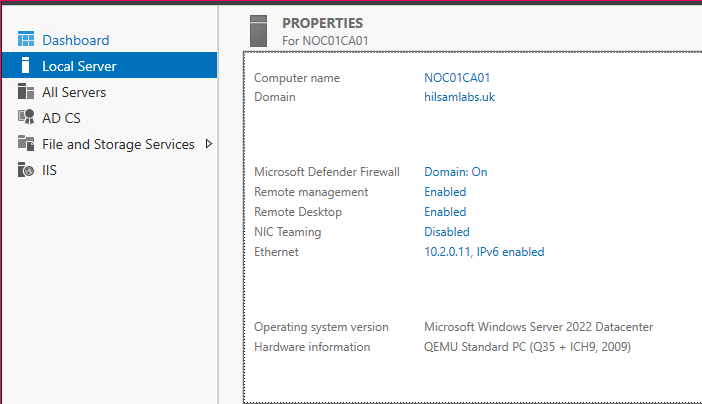
FIGURE 17 – Local Server Manager
Confirm the firewall is properly configured:
- Navigate to ‘Windows Defender Firewall’.
- Click the ‘Advanced settings’ button.
- Select ‘Inbound Rules’.
- Click the ‘Name’ tab once to order alphabetically.
- In the list of rules you should find the one you applied in your GPO.
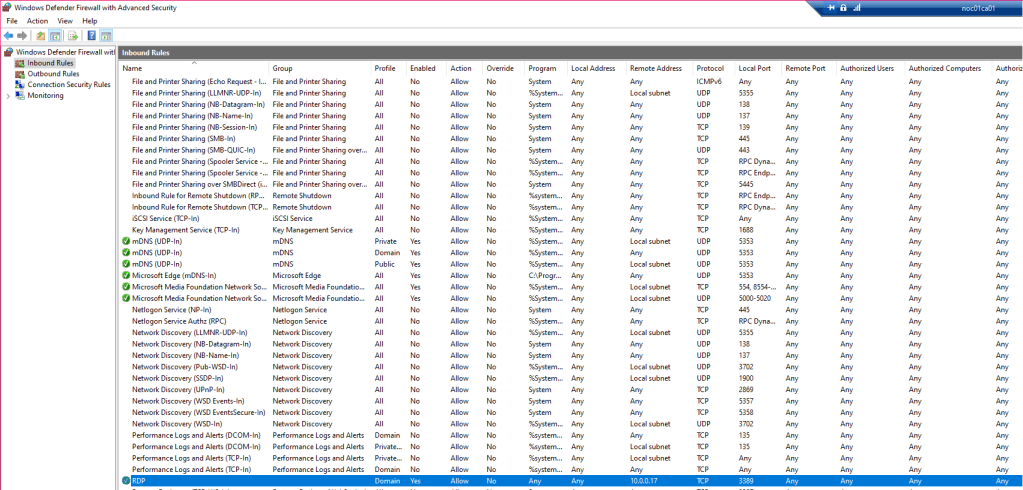
FIGURE 18 – Inbound Rules
SECTION VI – Footnotes
- RDP – the most commonly remote access protocol used within a Windows enterprise environment. This protocol allows you to remotely administer any enabled device as if you were directly connected. ↩︎

Leave a comment