Time to read:
In this post we are going to go over how to configure LDAPS (Lightweight Directory Access Protocol Secure) on a Windows DC (Domain Controller).
This post assumes that you already have an AD (Active Directory) domain configured and ready to go. Additionally, it assumes that you already have a Windows CA (Certificate Authority) configured.
- SECTION I – What is LDAPS?
- SECTION II – Configuration
- SECTION II – A – Create Certificate Template
- SECTION II – B – Generate LDAPS Certificate
- SECTION II – C – Export Certificate
- SECTION II – D – Import Certificate Into AD DS
- FIGURE 16 – Add or Remove Snap-Ins
- FIGURE 17 – Manage Service Account Certificates
- FIGURE 18 – Local Computer
- FIGURE 19 – Manage Active Directory Domain Services Certificates
- FIGURE 20 – Certificate Snap-in
- FIGURE 21 – Import Certificate
- FIGURE 22 – Select Certificate
- FIGURE 23 – Certificate Encryption Password
- FIGURE 24 – Certificate Store
- FIGURE 25 – Successful Import
- FIGURE 26 – Verify Imported Certificate
- SECTION III – Testing
SECTION I – What is LDAPS?
LDAP (Lightweight Directory Access Protocol) is an industry standard application protocol that is used to authenticate users over an IP (Internet Protocol) based network. LDAP has no encryption or authentication that can lead to user credentials being sniffed and stolen when transitting the network.
LDAPS is the same as LDAP, but, packaged up differently. LDAPS adds the functionality of encryption to the protocol so now any data transmitted between the DC and the client is secure. LDAPS relies on TLS (Transport Layer Security) in order to encrypt the data transmitted between the client and server.
SECTION II – Configuration
Now that we know a little bit about what LDAP we can get how to configure it on our DC. The main task we need to complete for this to work is to apply a certificate assigned by a common CA to our AD service.
SECTION II – A – Create Certificate Template
Firstly, we need to create a template that we can use the issue the certificate from the CA:
- Connect to your CA and open up the ‘Certificate Authority’ application.
- Select the ‘Certificate Templates’ tab in the left hand pane and then right click and select ‘Manage’.
- In the list of certificate templates locate the ‘Kerberos Authentication’ template. Right click on the template and click ‘Duplicate Template’.
- Under the general tab:
- Give the certificate a useful name.
- Tick the ‘Publish certificate in Active Directory’.
- Under the ‘Request Handling’ tab tick the ‘Allow private key to be exported’ checkbox.
- Under the ‘Subject Name’ tab make sure the ‘DNS name’ option is the only one ticked.
- Under the ‘Security’ tab make sure that the DC OU (Organisational Unit) has the ‘enroll’ and ‘autoenroll’ tickboxes selected.
- Click ‘Ok’ on the template properties and exit out of the template manager.
- In the main pane of the ‘Certificate Templates’ folder right click and select ‘New > Certificate Template to Issue’.
- Select your newly create certificate template.
- You should now see that certificate template listed.

FIGURE 1 – Manage Certificate Templates

FIGURE 2 – Certificate General Properties
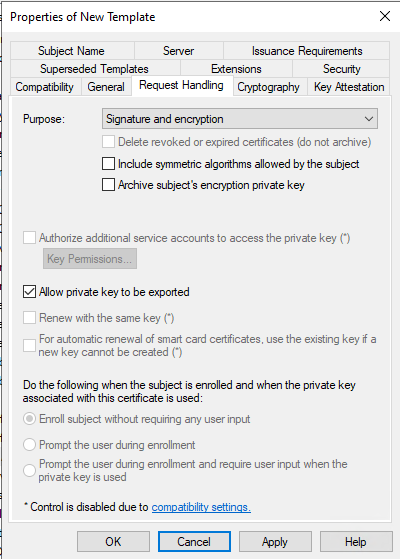
FIGURE 3 – Certificate Request Handling Properties

FIGURE 4 – Certificate Subject Name Properties
SECTION II – B – Generate LDAPS Certificate
Now that we have a correct template we can issue a certificate to our DC using that new template:
- On your DC open up ‘Manage Computer Certificates’.
- Under the ‘Personal\Certificates’ folder right click and select ‘All Tasks > Request New Certificate’.
- Click ‘next’ on the begining page.
- Click ‘next’ on the ‘Certificate Enrollement Policy’.
- From the list select the certificate template you created in Section II – A and then click ‘enroll’.
- Click ‘finish’ once the enrollment is completed.
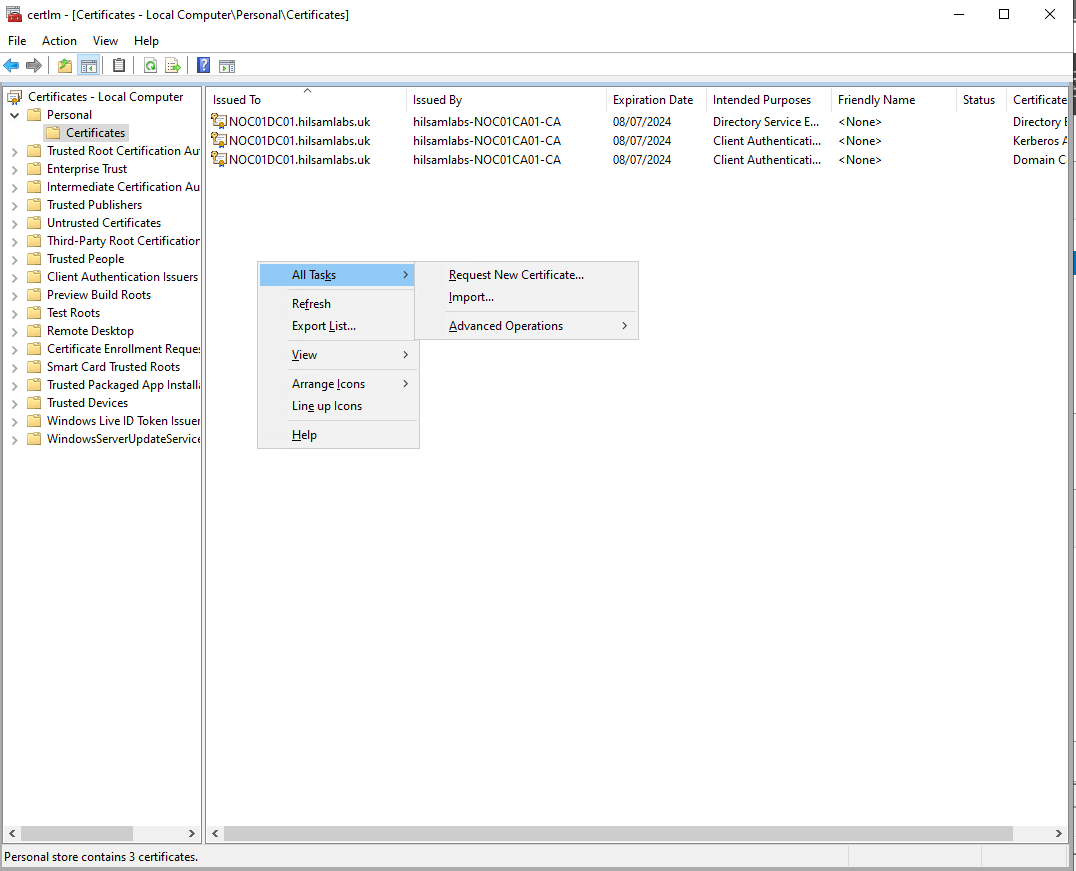
FIGURE 5 – Request Certificate

FIGURE 6 – Certificate Enrollment Policy

FIGURE 7 – Certificate Enrollment Template
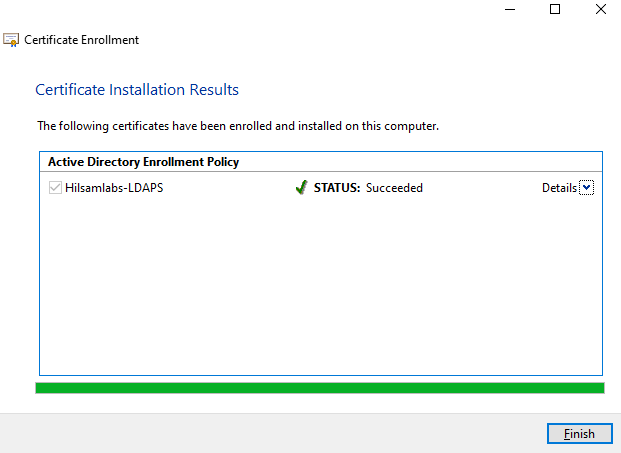
FIGURE 8 – Completed Certificate Enrollment
SECTION II – C – Export Certificate
Now that we have our certificate in the DC listed under our ‘Personal\Certificates’ folder we need to export it so we can then import it into AD:
- Select the certficate you just created. NOTE: you should see it says your newly created certifcate template under the ‘Certificate Template’ collumn.
- Right click on the certificate and select ‘All Tasks > Export’.
- Click ‘next’ on the first page of the wizard.
- Select the ‘Yes, export the private key’ radio button.
- Select the ‘Personal Information Exchange’ radio button.
- Tick the ‘Password’ check box and then give the certificate an easy to remember password. NOTE: I have selected ‘AES256-SHA256’ encryption because it make sense to use the most secure encryption available.
- Choose a suitable location to export the certificate to.
- Once you click ‘finish’ you should see a successfull export dialogue box.

FIGURE 9 – Listed Certificate

FIGURE 10 – Export Certificate

FIGURE 11 – Export Private Key
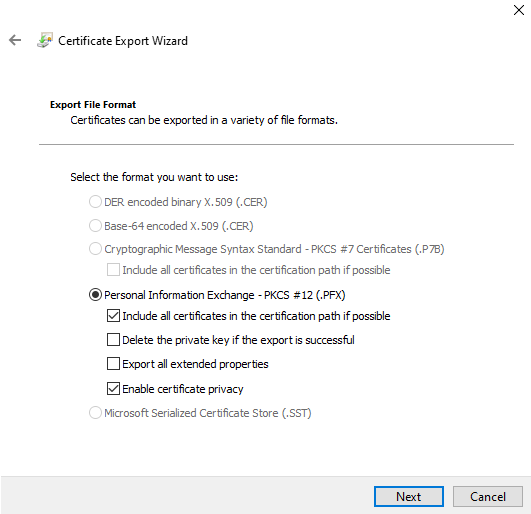
FIGURE 12 – Certificate Extension

FIGURE 13 – Certificate Password
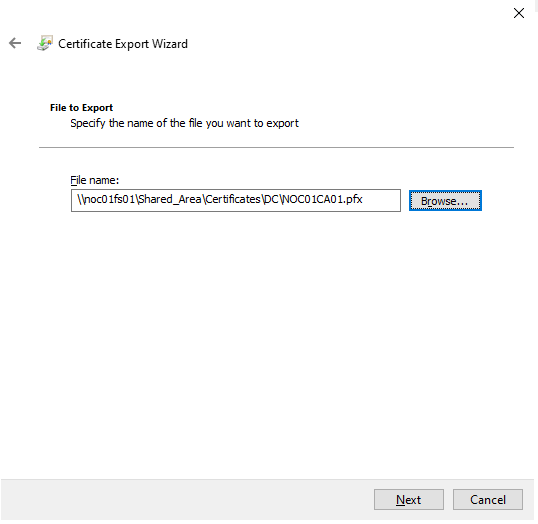
FIGURE 14 – Certificate Export Location

FIGURE 15 – Completed Certificate Export
SECTION II – D – Import Certificate Into AD DS
With our exported ‘.pfx’ certificate we can now import it into AD DS (Active Directory Domain Services):
- Right click on the Windows start icon and click ‘run’.
- Type ‘MMC’ and press enter.
- Click ‘File’ and then select ‘Add/Remove Snap-ins’.
- Double click on the ‘Certificates’ option to add it to the selected list.
- Select the ‘Service account’ radio button.
- Select the ‘Local computer’ radio button.
- Select the ‘Active Directory Domain Services’ account from the list.
- Click ‘Ok’ to open the snap-in.
- Select the ‘NTDS\Personal’ folder.
- Right click on the selected folder and select ‘All Tasks > Import’.
- Click ‘next’ at the welcome page to the wizard.
- Browse to your exported certificate location.
- Enter the encryption password you set for the certificate
- Leave the ‘Certificate Store’ option as it.
- Once finished you should get a successfull dialogue.
- Now you should see the ‘Certificates’ folder has been created and you should see the DC certificate as well as the CA certificate.

FIGURE 16 – Add or Remove Snap-Ins

FIGURE 17 – Manage Service Account Certificates
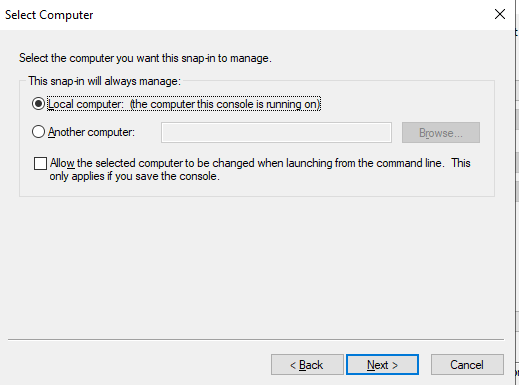
FIGURE 18 – Local Computer
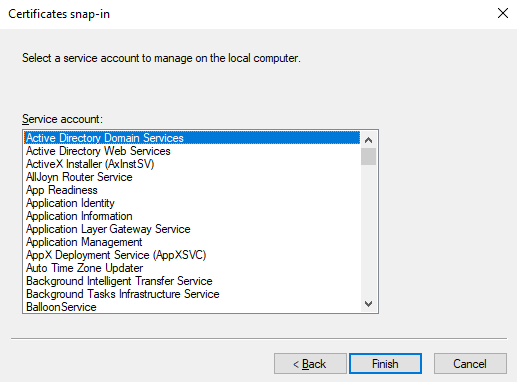
FIGURE 19 – Manage Active Directory Domain Services Certificates

FIGURE 20 – Certificate Snap-in

FIGURE 21 – Import Certificate

FIGURE 22 – Select Certificate

FIGURE 23 – Certificate Encryption Password

FIGURE 24 – Certificate Store

FIGURE 25 – Successful Import

FIGURE 26 – Verify Imported Certificate
SECTION III – Testing
Now that we have imported the certificate required for LDAPS we need to test that it is working as expected. To do that we need to:
- On your DC open a Powershell session as Administrator.
- Run the following command:
- In your main Windows search bar type in ‘ldp’.
- Within the LDP application click ‘Connection > Connect’.
- Enter the following:
- Server – DC FQDN (Fully Qualified Domain Name)
- Port – 636
- SSL – Ticked
- Once you click ‘Ok’ you should see ‘Established connection to <FQDN>’.
Install-WindowsFeature RSAT-AD-Tools -IncludeAllSubFeature -IncludeManagementTools

FIGURE 27 – Powershell Install
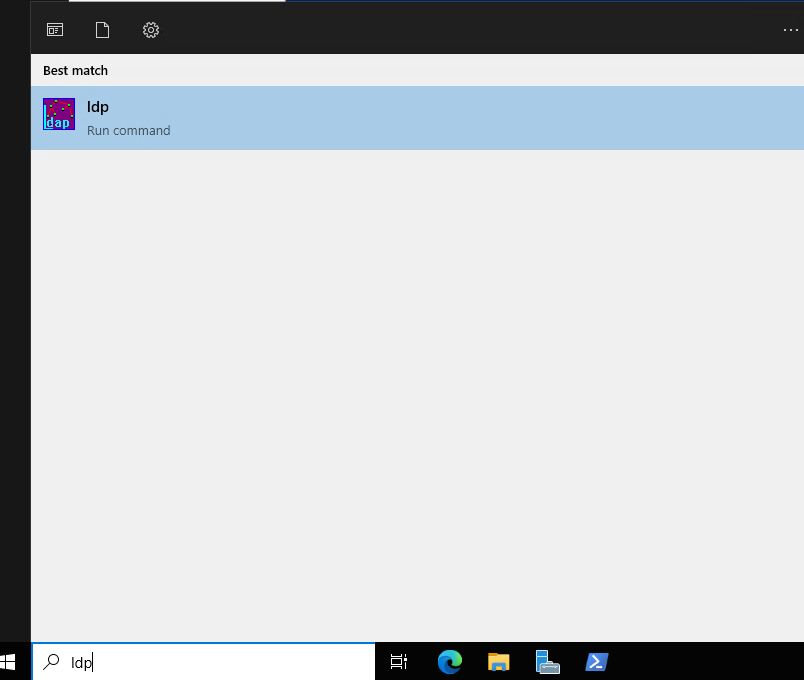
FIGURE 28 – LDP Application
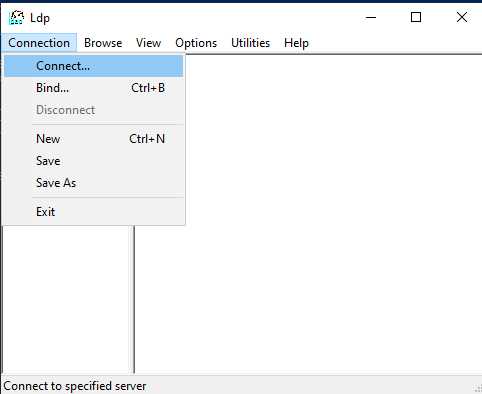
FIGURE 29 – LDP Connection
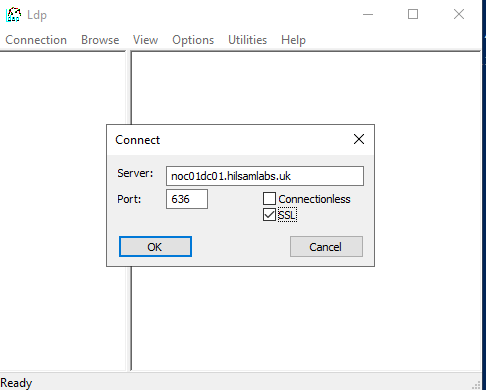
FIGURE 30 – LDP Connection Parameters


Leave a comment