Time to read:
In this post, we are going to continue our series on how to install Elastic (ELK) stack1 on Fedora 39. This post specifically will cover how to install Logstash on Fedora 39.
This will require that you already have Elasticsearch and Kibana installed and configured ready to go. If you need to see how to install Elasticsearch then click here. If you need to see how to install Kibana then click here.
This article assumes that you have a Fedora 39 machine setup and ready to go with an internet connection and Elasticsearch installed. If you are running Kibana and Elasticsearch on separate machines then install Logstash on your Elasticsearch machine.
In the case of my home lab I have a web proxy so if you have a similar setup make sure that you allow your proxy to forward traffic to the following internet domain name .elastic.co to download all the Elasticsearch application files.
- SECTION I – What is Logstash?
- SECTION II – Install Logstash
- SECTION III – Start Logstash
- SECTION IV – Footnotes
SECTION I – What is Logstash?
Logstash is a data processing pipeline that ingests data from multiple sources, parses and transforms it and then sends it to a storage solution, for example, Elasticsearch.
You can choose from a multitude of inputs to get data into Logstash. For more on the input formats click here.
Once the data is inputted you can then parse and transform the data using an array of filter plugins that you can see here.
Finally, the data can be outputted to what Logstash calls a ‘stash’. This is simply a play to store data. You can see the variety of outputs here.
SECTION II – Install Logstash
Now that we know a little bit about what Logstash is we can get to installing the service. This is a very simple installation.
In my case, I am going to be outputting my Logstash data to my Elastisearch instance. So I am going to install Logstash on the same machine as my Elasticsearch instance. This means that I already have the Elasticsearch repository installed on my machine. If you don’t follow Section II – B on the following post.
To install Logstash use the following command:
dnf install logstash

FIGURE 1 – Install Logstash
SECTION III – Start Logstash
Now that we have our Logstash application installed on the machine we need to start the service and get the service to start on boot. Use the following two commands to do so:
systemctl enable logstash
systemctl start logstash
Now use the following command to make sure that the service is running: NOTE: you should see ‘active (running)’ to denote the service is working properly.
systemctl status logstash
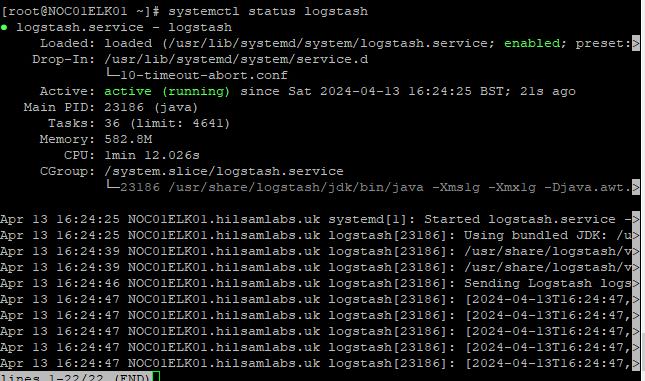
FIGURE 2 – Logstash Status
SECTION IV – Footnotes
- ELK Stack – this is a term used to refer to multiple services that have an end goal of ingesting data from any source in any format and providing a way to reliably and securely; search, analyse and visualise that data. ↩︎

Leave a comment