
In this post we are going to go over how you can use HashiCorp Packer to automatically build and create a template of Fedora server within Proxmox. This is a way that you can move your virtualised infrastructure to Infrastructure as Code (IaC).
When I first wanted to do this I found lots of article about deploying Ubuntu using Cloud Init within Proxmox, however, I didn’t find as much information on Fedora server deployment with Packer. The difference I found is that the initial stage of Fedora server deployment with Packer needs to be done using a Kickstart script.
Just a point to note, I am using Fedora server as my automation server, so that is what I will be using to run Packer to create my template within Proxmox. Additionally, I am making use of HashiCorp Vault as a way to store all my secrets and password so my example configuration files will use the Vault function to get confidential data.
For all the code navigate to my Github repository.
Section I – What is IaC?
Infrastructure as Code is the process of writing the code for the provisioning and configuration steps of the infrastructure components to help automate its deployment in a repeatable and consistent manner.
Some key benefits of IaC are:
- standardisation of infrastructure configuration with less risk of errors
- version controlled code in source code manager
- code can be integrated into Continuous Integration/Continuous Development pipelines
- faster and more efficient infrastructure changes
- better management and control of infrastructure with potentially reduced costs
Section II – Pre-Requisites
Before we start anything you will need Packer installed on your device. To do this, first make sure your device is up to date and then make sure required DNF plugins are installed:
sudo dnf install -y dnf-plugins-core
Now we can add the HashiCorp repository to our device:
sudo dnf config-manager –add-repo https://rpm.releases.hashicorp.com/fedora/hashicorp.repo
Finally install Packer:
sudo dnf -y install packer

With Packer installed we need to make sure we have the plugin for Proxmox using the following command:
packer plugins install github.com/hashicorp/proxmox

Create a directory to house all of the Packer files and then create the following structure within:
mkdir ./Fedora-Proxmox-Template
Fedora-Proxmox-Template/
|-- http/
        |-- ks.cfg
|-- fedora-server-baseline.pkr.hcl
|-- variables.pkr.hcl
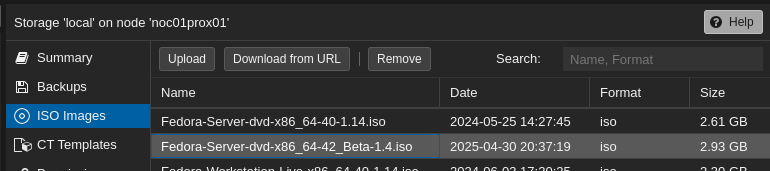
Finally, we need to make sure that the ISO image you want to use for the template is on the Proxmox server. You can set Packer to pull the image directly from the internet, however, I opted for it to pull locally.
Section III – Variables File
We will use a dedicated variables file to house some of the key variables that will be used in the rest of our configuration files. They just keeps things nice and tidy. Within the variables file define the following:
proxmox_api_url = "https://<Proxmox IP or Domain Name>:8006/api2/json"  # Your Proxmox API Endpoint

node = "<Proxmox Node Name>"
vm_id = "999" #This will be the ID of the VM template that gets created
vm_name = "fedora-server-baseline" #This will be the name of the VM template that gets created
template_description = "Fedora Server 42 Beta Image" #This will be a description of the VM template that gets created and can be useful to highligh any key features

# VM template compute parameters
disk_size= "20G"
cores = 2
memory = 2048

# User that will be used by Packer to initially connect to and configure the VM, depending on the configuration this use will need sudo/root capability
ssh_username ="root"
Section IV – Kickstart File
Within the http directory we need to create a kickstart file, this is essentially a file used by the operating system to fill in the required parameters to start an install without human interaction.
The file needs to contain the following:
lang en_GB.UTF-8 #Set this appropriate to your locale
keyboard gb #Set this appropriate to your locale
network --bootproto=dhcp #You can set a static IP or utilise DHCP for dynamic IP addressing on boot
rootpw --plaintext <Initial Root Password> #This will be a temporary root password
user --name=Initial Username> --password=<Initial User Password> --groups=wheel #This will be a default administrator account
firewall --enabled
selinux --enforcing
timezone Europe/London #Set this appropriate to your locale
bootloader --location=mbr --driveorder=sda
clearpart --all #This will remove any exisiting partitions on the drive
autopart #This will do automatic partitioning of the disk
reboot --eject

%packages
qemu-guest-agent #Make sure that this package gets installed because if you use DHCP this is how Promxox and then Packer will know the IP address to connect to
%end

%post
systemctl enable --now qemu-guest-agent
sed -i 's/^#PermitRootLogin.*/PermitRootLogin yes/' /etc/ssh/sshd_config
sed -i '/^PermitRootLogin/!aPermitRootLogin yes' /etc/ssh/sshd_config #I need to temporarily allow root access to login via SSH for initial configuration
systemctl restart sshd
%end
Make sure that in your Fedora kickstart script you install the qemu-guest-agent package, this will allow Proxmox to communicate the IP address of the Fedora image once it gets one from DHCP. I ran into the issue where Packer would sit and wait for the SSH connection for ages before it would timeout, I made sure to check that SSH with that user worked but it was the agent and Packer not knowing the IP address that caused the issues.
Section V – Packer File
Now we have our variables set out and our kickstart file to be able to initiate the operating system install on the template VM we can create our actual Packer file. Just a quick point, I am using HashiCorp Vault to store my secrets/confidential variables so I will be using the Vault function to retrieve them, it is recommended to make use of a secrets/credential manager like Vault so that no important data is left in plain text in your configuration files. Also, in my configuration I will be defining a HTTP port of 8535 on my Packer server to allow the template to get its kickstart file, make sure that you allow this through the firewall on the Packer server:
firewall-cmd –zone=internal –add-port=8535/tcp –permanent
firewall-cmd –reload
Make sure the Packer file has the following:
# Fedora Server Baseline
# ---
# Packer Template to create an Fedora Server Baseline on Proxmox

# Variable Definitions - These need to match the names within the variables file created earlier
variable "proxmox_api_url" {}
variable "node" {}
variable "memory" {}
variable "vm_id" {}
variable "vm_name" {}
variable "template_description" {}
variable "disk_size" {}
variable "cores" {}
variable "ssh_username" {}

# Get Secrets from HashiCorp Vault
locals {
    proxmox_api_token_id = vault("/secret/proxmox", "api_token_id") #The format is "/path/to/secret/vault", "secret name"
    proxmox_api_token_secret = vault("/secret/proxmox", "api_token_secret")
    initial_ssh_password = vault("/secret/fedora_server_default", "initial_ssh_password")
    default_admin_password = vault("/secret/fedora_server_default", "default_admin_password")
    default_root_password = vault("/secret/fedora_server_default", "default_root_password")
  }

# Resource Definition for the VM Template
source "proxmox-iso" "fedora-server-baseline-template" {

  # Proxmox Connection Settings
  proxmox_url              = var.proxmox_api_url
  username                 = local.proxmox_api_token_id
  token                    = local.proxmox_api_token_secret
  insecure_skip_tls_verify = true

  # VM General Settings
  node                 = var.node
  vm_id                = var.vm_id
  vm_name              = var.vm_name
  template_description = var.template_description

  # VM OS Settings
  boot_iso {
      type = "scsi"
      iso_file = "local:iso/Fedora-Server-dvd-x86_64-42_Beta-1.4.iso" #This is the filename of the ISO to use, this ISO needs to already be present on the Promxox server, alternatively you could tell packer to fetch a specific ISO over HTTPS each time it runs
      unmount = true
      iso_checksum = "sha256:a1a6791c606c0d2054a27cec5a9367c02a32b034284d2351e657c3a7f4f489e7" #Exact hash of the ISO image
    }

  # VM System Settings
  qemu_agent = true #This is how Packer is going to be able to fetch the new VMs network details from Proxmox

  # VM Hard Disk Settings
  scsi_controller = "virtio-scsi-pci"

  disks {
    disk_size         = var.disk_size
    storage_pool      = "local-lvm"            # LVM storage pool name
    type              = "scsi"
  }

  # VM CPU Settings
  cores = var.cores

  # VM Memory Settings
  memory = var.memory

  # VM Network Settings
  network_adapters {
    model    = "virtio"
    bridge   = "vmbr0"
    firewall = "false"
  }

  # VM Cloud-Init Settings
  cloud_init              = false # In my configuration I am not using Cloud Init to deploy my Fedora Servers
  #cloud_init_storage_pool = "local-lvm"          # LVM storage pool name

  # PACKER Boot Commands
  boot_command = [
    "<up><wait>",
    "e<wait>",
    "<down><down><end>",
    " inst.ks=http://{{ .HTTPIP }}:{{ .HTTPPort }}/ks.cfg",
    "<f10>"
  ]
  boot      = "c"
  boot_wait = "5s"

  # PACKER Autoinstall Settings
  http_directory    = "http"
  http_bind_address = "192.168.1.31" #This needs to be the address of your Packer server where the HTTP kickstart file is hosted
  http_port_min     = 8535 #This port needs to be allowed through the Packer server firewall
  http_port_max     = 8535

  # PACKER SSH Settings
  ssh_username = var.ssh_username
  ssh_password = local.initial_ssh_password

  # Raise the timeout, when installation takes longer
  ssh_timeout            = "30m"
  ssh_handshake_attempts = 1000

}

# Build Definition to create the VM Template
build {

  name    = "fedora-server-baseline-template"
  sources = ["source.proxmox-iso.fedora-server-baseline-template"]

  # Provisioning Commands
  provisioner "shell" {
    inline = [
      # Update system packages
      "dnf update -y",


      # Change root password
      "echo 'root:${local.default_root_password}' | chpasswd",

    # Change admin password (replace 'admin' with your actual admin username)
    "echo 'Admin:${local.default_admin_password}' | chpasswd",

    # Disable Root SSH Login
    "sed -i 's/^#*PermitRootLogin.*/PermitRootLogin no/' /etc/ssh/sshd_config",
    "systemctl reload sshd"
    ]
  }
}
Section VI – Deploying Packer File
We have all of our files configured and ready to go, the last part to do it use the following command to actually deploy the Packer template within Proxmox:
cd ./Fedora-Proxmox-Template
packer build -var-file=./variables.pkr.hcl ./fedora-server-baseline.pkr.hcl
NOTE: If you are using Hashicorp Vault to store your secrets you will nee the following 2 environmental variables present before you run the packer build command:
- VAULT_TOKEN
- VAULT_ADDR
You can do this with the following:
export VAULT_TOKEN=<Active Vault Token>
I have a read account and the easiest way for me to get a token is login to the read account on the web GUI and then under my account click the copy token

export VAULT_ADDR=<https://IP or Hostname:8200>
If you don’t set the environment variables you will get the following error:


Leave a comment