
Homelabs are a great place to create and try out new technologies. The last thing you want it so spend all your time setting up in the infrastructure and getting it configured rather than actually learning or exploring the new technology. One of the main aim I have within my homelab is how can I make the actual running of the infrastructure as painless and simple as possible.
In steps how I am using GitOps and Packer to steamline the process of creating Virtual Machine (VM) templates within my Proxmox homelab environment.
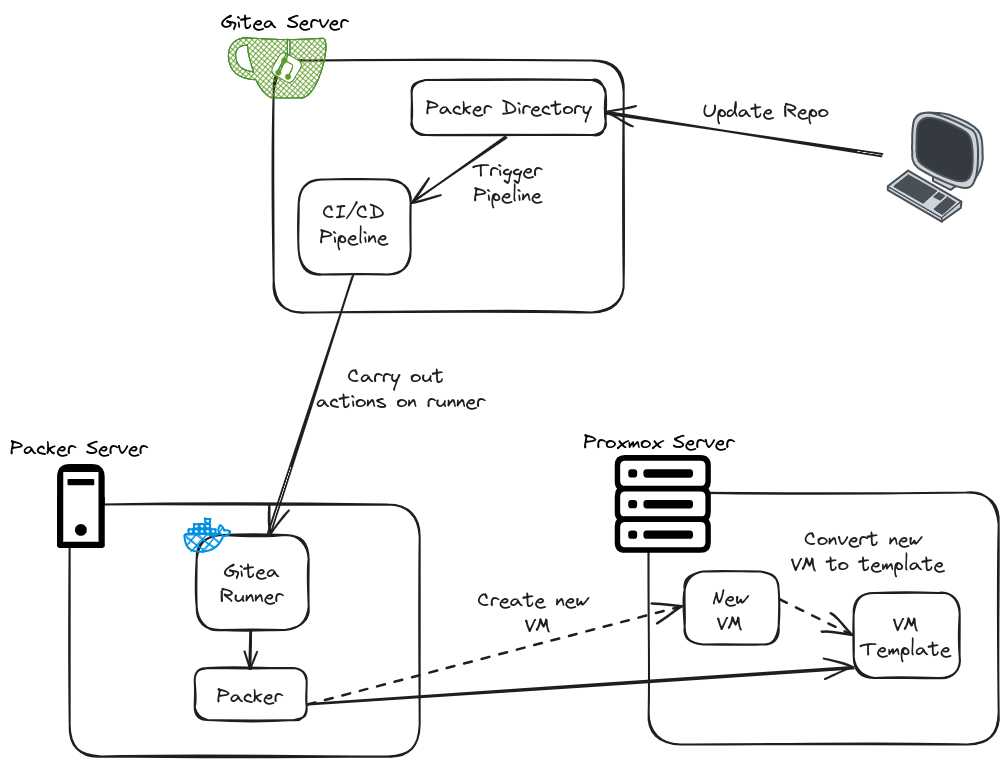
Below is a simple diagram to show how all the pieces of the puzzle fit together.
Section I – Why Automate Template Deployments?
Automating the template deployments is a way to ensure there is some standardisation and consistency within your environment. This means whenever you go to deploy a VM from the template that has been created automatically you know its going to be good to go. You won’t have to sit there an manually install the Operating System (OS) from an ISO file before you can get started experimenting.
Additionally, there is a huge speed and efficiency bonus. Lets say a newer version of your VM templates OS has come out and you have 4 Proxmox server where you have the VM template currently. Imagine if you can just change 1 line within your configuration file to point to the new Uniform Resource Locator (URL) for the latest OS ISO file and then as soon as you save that configuration change in the background now all of you Proxmox servers are downloading the latest ISO and putting them on their local data stores, then the OS is installed in a new VM and it is converted to a template. Absolute winner, I had to do 1 thing and I know all my servers are in the same state and good to go.
Section II – What is GitOps and Packer?
Before we get into the configuration lets quickly explore what I mean when I say Packer and GitOps.
Packer is an open-source tool, created by HashiCorp, used to automate the creation of machine images for multiple platforms such as AWS, Azure, Google Cloud, Docker, and more, all from a single configuration file. It enables organisations to define image creation workflows as code, making the building of virtual machine or container images consistent, repeatable, and version-controlled.
GitOps is a software operations methodology that uses Git repositories as the central source of truth for defining and managing infrastructure and application configurations. All desired state information like code, deployment configurations, and infrastructure setup is stored and versioned in Git, enabling automation and continuous deployment of changes when updates occur in the repository.
For the configuration below I will not be going through how to do the install of Packer itself on the machine that runs your automations. Instead I am focusing on the Packer configuration files and the GitOps workflow to get this automation to work.
Section III – Proxmox Configuration
The first thing we need to setup is how Packer is going to be able to connect to Proxmox and actually carry out the template deployments. For that we need to create a user account and make sure it has the appropriate permissions.
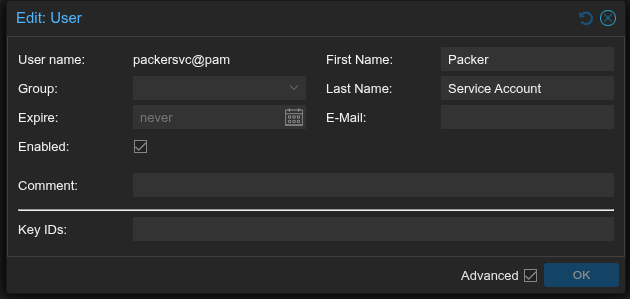
To create the user navigate to the Proxmox web Graphical User Interface (GUI) and then select Datacenter and under Permissions select Users.

Click the Add button and then enter some appropriate details.
Now lets create a permissions role we can easily assign this role as permissions to the user.
Navigate to the Roles tab under Permissions.

Select the Create button.
Give the new role a appropriate name and then I have added all the following permissions:

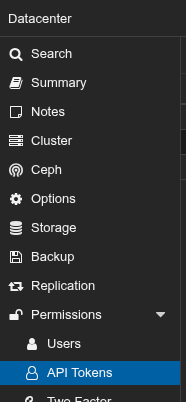
Now Navigate to the API Tokens tab under Permissions.
Select the Add button and create an Application Programmable Interface (API) token for the newly created Packer user. For my instance I have actually created an API token for each Proxmox node I have. NOTE: Make sure you securely save the API token secrets – Something I am not going to cover in this post is the setup of a Key Vault, you need to store the API tokens in a location that Packer will be able to securely retrieve them from in my case I use a HashiCorp Vault instance. You could equally use Secrets store within the Gitea Actions settings.

Now we can get the permissions assigned to each of those API tokens which you can do by selecting the Permissions tab.
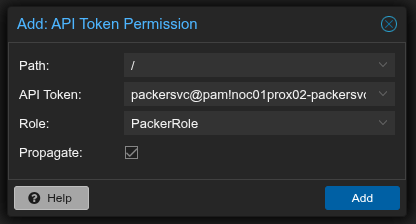
Then select Add and select API Token Permission from the drop down.
You need to configure the relevant options:
- Path – You can leave at ‘/’ for permission within the entire Datacenter or lock down to a specific Proxmox node
- API Token – Select the relevant token you created earlier
- Role – Select the Packer Role you created earlier
- Propogate – Ensure is ticked
Section IV – Gitea Configuration
Awesome we have a way to access our Proxmox server with the correct account permissions. Now lets get our chosen Git implementation configured. For my homelab setup I am using Gitea so the specific steps will be slightly different if you are using Github or Gitlab to do this but here is the overarching steps we need to do:
- Create a repository
- Connect an actions runner on your server where Packer is locally installed to the repository
- Configure the actions workflow to trigger when changes are made to the Packer folder within your repository
Within the Gitea web GUI select the + icon and then select New Repository.
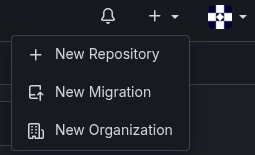
In my example I will give mine repo a name of “Infrastructure-Automation”.
Navigate to the new repository and then select Settings.
Within settings select Runners under Actions.
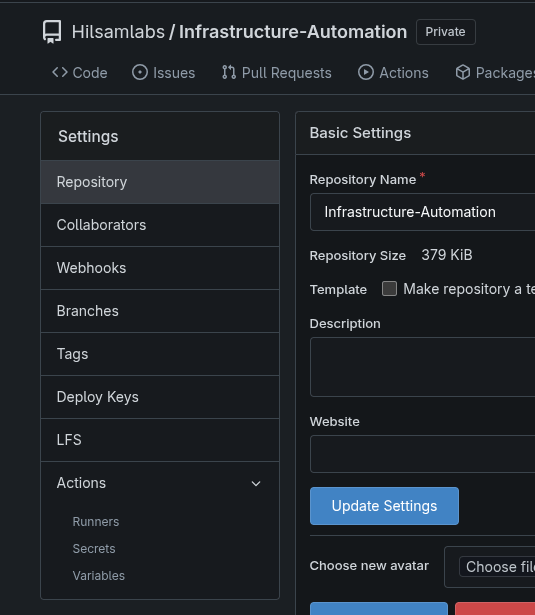
Select Create new Runner and make a note of the Registration token.
On the server that will carry out the actions of the runner, this is the server that has Packer installed you need to install the Gitea runner.
Navigate to Gitea act runner release page and copy the link for the latest version of the runner appropriate for your system – https://gitea.com/gitea/act_runner/releases
Download the runner content:
wget -O act_runner (copied URL)
Make the runner executable:
chmod +x act_runner
Move the runner file into the appropriate directory:
sudo mv act_runner /usr/local/bin/

Create a dedicated runner user:
sudo useradd –system –create-home –shell /bin/bash act_runner
Register the runner to your Gitea instance:
sudo -u act_runner act_runner register –no-interactive –instance http://<Gitea Server>:<port which is typically 3000> –token <YOUR_TOKEN> –name <runner name> –labels <runner labels>
Install and start the appropriate packages for the Gitea runner:
dnf install docker nodejs -y
systemctl start docker
systemctl enable docker
Add your runner user to the docker group:
sudo usermod -aG docker act_runner
Create the act runner service file:
vi /etc/systemd/system/act_runner.service
[Unit]
  Description=Gitea Actions runner
  After=docker.service

  [Service]
  ExecStart=/usr/local/bin/act_runner daemon
  User=act_runner
  WorkingDirectory=/home/act_runner
  Restart=always

  [Install]
  WantedBy=multi-user.target
Refresh systemd and then start and enable the act runner service:
systemctl daemon-reload
systemctl start act_runner
systemctl enable act_runner
Now if you refresh your web GUI on the runners page for the repo you should see your runner listed.

Now lets create the actions workflow file it needs to be in the follow directory within the repo:
.gitea/workflows
Then you can name the workflow itself anything as long as it is a Yet Another Markup Language (YAML) file, for example here is mine:
build-fedora-proxmox-packer-template.yml
Here is my workflow to create the packer template on all of my servers:
name: Build Fedora Proxmox Packer Template
  on:
      push:
          paths:
              - 'Packer/Fedora-Proxmox-Template/**'
          branches:
            - main

  jobs:
      build-template:
          runs-on: Automation01
          steps:
              - name: Checkout repository
                uses: https://gitea.hilsamlabs.uk:3002/Public/checkout@v4 #I point my runner checkout to pull from my local Gitea instance if you just want to use the publicly hosted one do actions/checkout@v4
                env: #If you choose the publically hosted actions/checkout then you don't need to set the environmental variable
                  GITHUB_SERVER_URL: https://gitea.hilsamlabs.uk:3002

              - name: Authenticate to Vault via LDAP and get token # This is specific to connecting to my HashiCorp Vault to get a token that can be used within my Packer configuration
                id: vault-auth
                env:
                  VAULT_ADDR: "https://vault.hilsamlabs.uk:8200"
                  LDAP_USER: ${{ secrets.VAULT_LDAP_READ_USER }}
                  LDAP_PASS: ${{ secrets.VAULT_LDAP_READ_USER_PASSWORD }}
                run: |
                  VAULT_TOKEN=$(curl --request POST \
                    --data "{\"password\": \"${LDAP_PASS}\"}" \
                    ${VAULT_ADDR}/v1/auth/ldap/login/${LDAP_USER} | jq -r .auth.client_token)
                  echo "::add-mask::$VAULT_TOKEN"
                  echo "VAULT_TOKEN=$VAULT_TOKEN" >> $GITEA_ENV
                  echo "VAULT_ADDR=$VAULT_ADDR" >> $GITEA_ENV

              - name: Build New Packer Template
                env:
                  VAULT_TOKEN: ${{ env.VAULT_TOKEN }}
                  VAULT_ADDR: ${{ env.VAULT_ADDR }}
                  PROX_SERVERS: '["noc01prox01","noc01prox02","noc01prox03","noc01prox04"]' #These are the hostnames of all my Proxmox servers
                run: |
                  servers=$(echo '${{ env.PROX_SERVERS }}' | jq -r '.[]')
                  cd ./Packer/Fedora-Proxmox-Template
                  for server in $servers; do
                    if curl --silent --fail "https://${server}.hilsamlabs.uk:8006/"; then
                      echo "Building on $server..."
                      packer build -force -var-file=./variables.pkr.hcl -var="node=$server" ./fedora-server-baseline.pkr.hcl
                    else
                      echo "Skipping $server - not accessible."
                    fi
                  done
                shell: bash
Section V – Packer Configuration
Onto the final piece of the puzzle we have a way to access Proxmox, a workflow to carry out the Packer template creation, the final bit is having the actual Packer configuration that will be ran.
In my case I am deploying a Fedora Server image and I use a Kickstart script to get the server initially installed so that Packer can connect to it and then carry out the rest of the configuration before converting the VM to a template within Proxmox.
Here is the folder structure I am using within my repo:
- Packer/
  	- Fedora-Proxmox-Template/
      	- http/
          	- ks.cfg
        - fedora-server-baseline.pkr.hcl
        - variables.pkr.hcl
Here is what is in my Kickstart file:
lang en_GB.UTF-8
  keyboard gb
  network --bootproto=dhcp
  rootpw --plaintext <Temporary Password> #--allow-ssh
  user --name=Admin --password=<Temporary Password> --groups=wheel
  firewall --enabled
  selinux --enforcing
  timezone Europe/London
  bootloader --location=mbr --driveorder=sda
  clearpart --all
  autopart
  reboot --eject

  %packages
  qemu-guest-agent
  @server-hardware-support
  @domain-client
  %end

  %post
  systemctl enable --now qemu-guest-agent
  sed -i 's/^#PermitRootLogin.*/PermitRootLogin yes/' /etc/ssh/sshd_config
  sed -i '/^PermitRootLogin/!aPermitRootLogin yes' /etc/ssh/sshd_config
  systemctl restart sshd
  %end
Here is what is within my Packer variables file:
# VM Details
  vm_id = "999"
  vm_name = "fedora-server-baseline"
  template_description = "Fedora Server 43 Beta Image"
  disk_size= "20G"
  cores = 2
  memory = 2048

  # Initial SSH Credentials
  ssh_username ="root"
Here is what is within my Packer file:
# Fedora Server Baseline
  # ---------
  # Packer Template to create an Fedora Server Baseline on Proxmox

  # Variable Definitions
  #variable "proxmox_api_url" {}
  variable "node" {}
  variable "memory" {}
  variable "vm_id" {}
  variable "vm_name" {}
  variable "template_description" {}
  variable "disk_size" {}
  variable "cores" {}
  variable "ssh_username" {}


  locals {
      proxmox_api_url = "https://${var.node}.hilsamlabs.uk:8006/api2/json"
      proxmox_api_token_id = vault("/secret/${var.node}", "api_token_id")
      proxmox_api_token_secret = vault("/secret/${var.node}", "api_token_secret")
      initial_ssh_password = vault("/secret/fedora_server_default", "initial_ssh_password")
      default_admin_password = vault("/secret/fedora_server_default", "default_admin_password")
      default_root_password = vault("/secret/fedora_server_default", "default_root_password")
  }

  # Resource Definition for the VM Template
  source "proxmox-iso" "fedora-server-baseline-template" {

    # Proxmox Connection Settings
    proxmox_url              = local.proxmox_api_url
    username                 = local.proxmox_api_token_id
    token                    = local.proxmox_api_token_secret
    insecure_skip_tls_verify = true

    # VM General Settings
    node                 = var.node
    vm_id                = var.vm_id
    vm_name              = var.vm_name
    template_description = var.template_description

    # VM OS Boot ISO From Local File
    #boot_iso {
    #    type = "scsi"
    #    iso_file = "local:iso/Fedora-Server-dvd-x86_64-42_Beta-1.4.iso"
    #    unmount = true
    #    iso_checksum = "sha256:a1a6791c606c0d2054a27cec5a9367c02a32b034284d2351e657c3a7f4f489e7"
    #}

    # VM OS Boot ISO From Downloaded File
    boot_iso {
      type = "scsi"
      iso_url = "https://fedora.mirrorservice.org/fedora/linux/releases/43/Server/x86_64/iso/Fedora-Server-dvd-x86_64-43-1.6.iso"
      iso_storage_pool = "local"
      unmount = true
      iso_checksum = "file:https://fedora.mirrorservice.org/fedora/linux/releases/43/Server/x86_64/iso/Fedora-Server-43-1.6-x86_64-CHECKSUM"
    }

    # VM System Settings
    qemu_agent = true

    # VM Hard Disk Settings
    scsi_controller = "virtio-scsi-pci"

    disks {
      disk_size         = var.disk_size
      storage_pool      = "local-lvm"            # LVM storage pool name
      type              = "scsi"
    }

    # VM CPU Settings
    cores = var.cores

    # VM Memory Settings
    memory = var.memory

    # VM Network Settings
    network_adapters {
      model    = "virtio"
      bridge   = "vmbr0"
      vlan_tag = "103"
      firewall = "false"
    }

    # VM Cloud-Init Settings
    cloud_init              = false
    #cloud_init_storage_pool = "local-lvm"          # LVM storage pool name

    # PACKER Boot Commands
    boot_command = [
      "<up><wait>",
      "e<wait>",
      "<down><down><end>",
      " inst.ks=http://{{ .HTTPIP }}:{{ .HTTPPort }}/ks.cfg",
      "<f10>"
    ]
    boot      = "c"
    boot_wait = "5s"

    # PACKER Autoinstall Settings
    http_directory    = "http"
    http_bind_address = "192.168.3.28" #This needs to be the IP of the server Packer is running on
    http_port_min     = 8535 #Make sure this port is allowed through the servers host firewall
    http_port_max     = 8535

    # PACKER SSH Settings
    ssh_username = var.ssh_username
    ssh_password = local.initial_ssh_password

    # Raise the timeout, when installation takes longer
    ssh_timeout            = "30m"
    ssh_handshake_attempts = 1000

  }

  # Build Definition to create the VM Template
  build {

    name    = "fedora-server-baseline-template"
    sources = ["source.proxmox-iso.fedora-server-baseline-template"]

    # Provisioning Commands
    provisioner "shell" {
      inline = [
        # Update system packages
        "dnf update -y",
        "dnf clean all",

        # Stop History Recording
        "unset HISTFILE",

        # Change root password
        "echo 'root:${local.default_root_password}' | chpasswd",

      # Change admin password (replace 'admin' with your actual admin username)
      "echo 'Admin:${local.default_admin_password}' | chpasswd",

      # Disable Root SSH Login
      "sed -i 's/^#*PermitRootLogin.*/PermitRootLogin no/' /etc/ssh/sshd_config",
      "systemctl reload sshd"
      ]
    }
  }

Leave a comment